To blackout windows for a grow room, you need to create a 100% light-proof seal using materials like blackout curtains, foam board, or special film. The key is to get rid of all light leaks around the edges with weatherstripping or caulk to make sure it’s completely dark during your plants’ off-cycle.
Why Blacking Out Grow Room Windows Is a Must
So, you’ve picked out some killer feminized or autoflower cultivars from our bank and you’re stoked to get started. That’s the spirit. But before you pop those seeds, we need to have a serious chat about your grow space, specifically any windows in the room.
Getting your lighting dialed in is more than just buying a good lamp. It’s about having total control over when the lights are on and, more importantly, when they are off. When your plants are supposed to be sleeping, they need absolute, complete, pitch-black darkness.
The Importance of the Dark Cycle
Think of the dark cycle as your plants’ bedtime. This is when they process all the energy they soaked up during the “day” and focus on important growth functions. Even a tiny sliver of light from a streetlamp or a passing car can interrupt this process.
This light pollution acts like a constant alarm clock, confusing your plants and causing them serious stress. Stressed plants can lead to a bunch of problems you just don’t want to deal with.
For cannabis plants, a consistent and uninterrupted dark period is just as important as the light cycle. Light leaks can confuse their internal clocks, potentially triggering them to flower too early or even causing them to become hermaphrodites, which can ruin your entire crop of smokable flower.
How Light Leaks Mess With Your Plants
Even if you think a little light won’t hurt, it can have some pretty gnarly effects. Here’s what you risk by not taking blacking out your windows seriously:
- Reduced Yields: A stressed plant is an unproductive plant. It will spend energy dealing with the light confusion instead of packing on weight.
- Hermaphroditism: Light leaks are a top cause of female plants developing male parts (pollen sacs). Once that happens, they can pollinate your other females, leading to a harvest full of seeds instead of potent buds.
- Poor Plant Health: Constant stress weakens a plant’s immune system, making it more likely to get pests and diseases.
Basically, if you want to get the most out of the awesome genetics in those cultivars you bought, creating a perfectly dark environment is a must. If you’re just getting started, understanding these basics is key, and you can find more tips in our guide to the simplest starter grow setup for first-time cultivators. Skipping this step is one of the biggest rookie mistakes, but it’s also one of the easiest to avoid.
Choosing the Right Blackout Method for Your Space
Alright, you get it, your grow room needs to be a pitch-black cave during lights-off. Now for the fun part: figuring out how to make that happen. There’s more than one way to seal off a window, and the best choice really comes down to your specific setup.
Are you renting and need something that won’t get you in trouble with the landlord? Or are you building a permanent grow fortress in a space you own? Let’s walk through the options so you can pick what makes the most sense for your room, budget, and how much effort you’re willing to put in.
Temporary vs. Permanent Solutions
The first big question to ask yourself is how permanent this needs to be. Your answer will narrow the field down fast.
- Temporary Fixes: These are perfect for renters, growers on a tight budget, or anyone who might want to use that room for something else down the line. We’re talking about things you can easily put up and take down without leaving a trace.
- Permanent Setups: This is for the dedicated grower who has a space they can truly commit to the cause. These methods are usually more effective and last longer, but they take more work to install and are a pain to reverse.
For a lot of people, especially those in apartments, a temporary solution is the only real option. But if you own your spot, going permanent from day one can save you a ton of headaches later on.
Comparing Your Blackout Options
Let’s get into the details of the most common methods growers use. Each has its pros and cons, so think about what’s most important to you. Is it cost? Simplicity? Or just pure, uncompromising darkness?
Blackout Curtains
These are probably the first thing that pops into your head. They’re everywhere and super easy to find. The key is to get a set that’s wider and longer than your window frame to stop light from creeping in around the edges. Pairing them with a wrap around curtain rod is a veteran move.
They’re not just for growers, either. The market for blackout fabrics is huge, valued at USD 1.2 billion in 2025 and expected to hit USD 2.1 billion by 2035. A big reason why is that they can slash home energy bills by up to 30%. You can learn more about the growth of the blackout fabric market to see just how mainstream this stuff has become.
Blackout Window Film
This is a thin film you apply directly to the glass, kind of like a window tint. It’s a great semi permanent option that looks clean from both inside and out. The best ones block 99% of light and can cut down on heat, too. The only real catch is that installation can be a bit finicky; you have to be patient to avoid getting bubbles trapped underneath.
Pro Tip: When you’re considering a more permanent solution like window film, remember that it’s just one piece of the puzzle. For a completely sealed environment, especially if you’re not using a dedicated tent, you still need to pay close attention to light leaks around the frame.
DIY Foam Board Inserts
This is my personal favorite for a cheap, highly effective, and completely removable solution. You just cut a piece of rigid foam insulation board to the exact size of your window’s inner frame. If you get the cut right, it should fit snugly enough to stay in place all by itself, creating a nearly perfect seal. You can even paint one side white to reflect light and heat back into your room.
Panda Film
This stuff is a grower’s staple for a reason. It’s a heavy duty plastic sheeting that’s jet black on one side and brilliant white on the other. You can tape or staple it directly over the entire window frame for a 100% light-proof seal. The white side is a nice bonus, as it helps reflect light back toward your plants.
While it’s incredibly effective, it’s not exactly subtle, making it best for dedicated rooms where looks don’t matter. It’s also a go to material if you’re building a larger grow room from scratch instead of using a pre-made tent. We cover some similar principles in our guide on how to set up a grow tent.
Blackout Method Comparison
Still on the fence? This table breaks down the most popular methods at a glance, helping you weigh the cost, effectiveness, and best case use for each one.
| Method | Cost | Effectiveness | Best For |
|---|---|---|---|
| Blackout Curtains | Low to Medium | Good to Great | Renters, multi-use rooms |
| Window Film | Low | Great | Homeowners, clean look |
| Foam Board (DIY) | Very Low | Excellent | Anyone on a budget, renters |
| Panda Film | Very Low | Excellent | Dedicated grow spaces, tents |
Ultimately, choosing the right method is about finding the right balance for your situation. A simple foam board insert might be all you need to get those top shelf results from your favorite autoflower cultivars. Don’t overthink it. Just pick the one that fits your life and get those windows covered.
A Practical Guide to Installing Blackout Materials
Alright, so you’ve weighed the options and picked the best blackout method for your setup. Perfect. Now for the fun part: making it happen and turning that room into a light proof sanctuary for your plants. This is where we get hands on.
We’re going to walk through the essential steps, from getting your measurements spot on to installing the most popular options. No fluff here, just the straight up details you need to get a perfect seal on the first try. The goal is to get those windows covered efficiently so you can get back to focusing on what really matters: your plants.
This simple flowchart breaks down the whole process, from figuring out your situation to choosing and installing the right blackout solution.
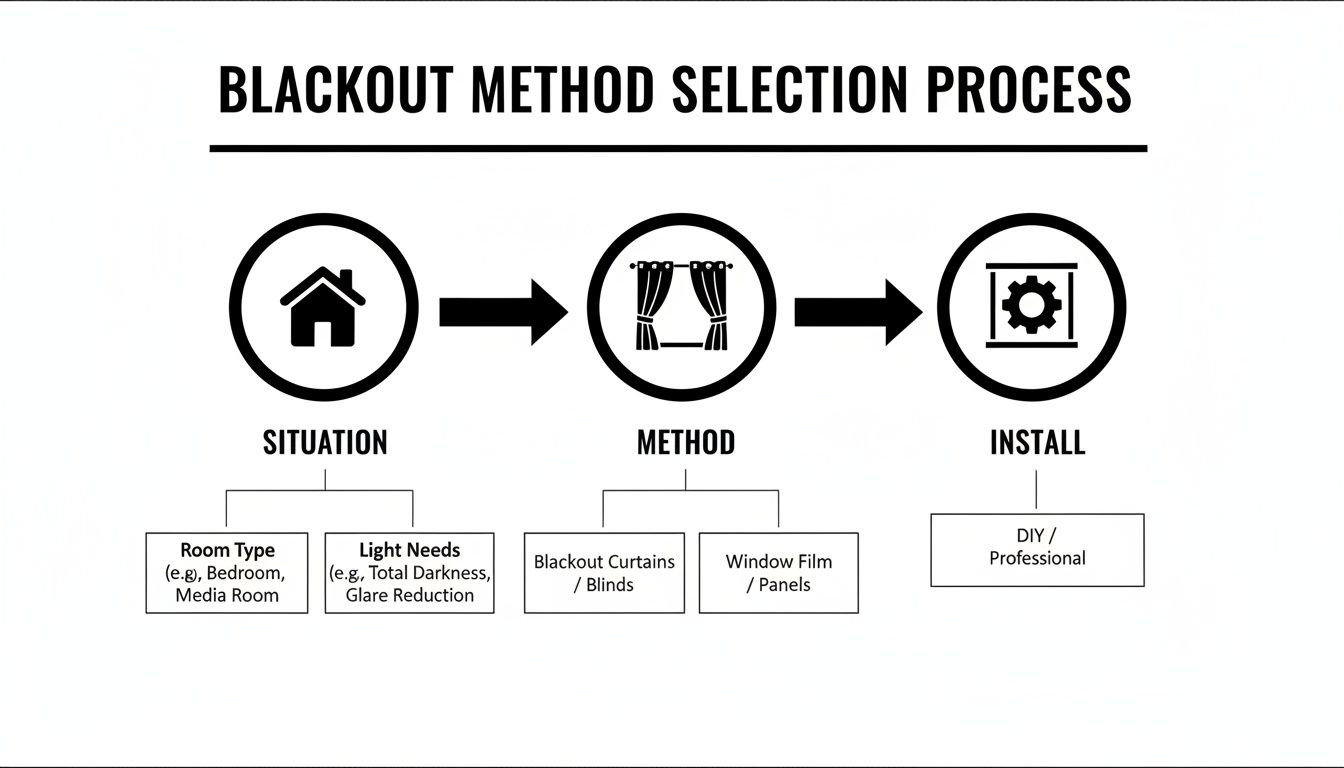
As you can see, your personal situation dictates the method, which then determines the installation steps you’ll need to follow.
Getting Your Measurements Right
Before you even think about cutting or buying anything, you have to measure your windows. It sounds basic, I know, but getting it wrong is the number one reason people end up with those annoying light leaks that drive you crazy. You want to be precise.
Grab a tape measure and get two key dimensions: the inside of the window frame and the outside.
- Inside Measurement: Measure the height and width of the glass area itself, right up against the frame. This is the number you’ll use for things like DIY foam board inserts that need to fit snugly.
- Outside Measurement: Measure from the outer edge of the window trim on one side to the outer edge on the other. This measurement is key for blackout curtains or panda film, where you need to overlap the frame completely.
Pro Tip: Measure twice, cut once. Seriously. Double check your numbers. It also helps to add at least four to six inches to your outside measurements for curtains or film. This makes sure you have a generous overlap that blocks any light trying to creep in from the sides.
Installing Blackout Curtains
Blackout curtains are a go to for a reason; they’re easy and effective, but only if you do it right. The real trick isn’t just the curtain itself, but the hardware you use with it.
First off, get a wrap around curtain rod. These rods curve back toward the wall at the ends, allowing the curtain to sit completely flush. This one simple change eliminates that classic vertical sliver of light you get with standard straight rods.
When hanging the rod, mount it three to six inches above the top of the window trim and make sure it extends at least three to five inches wider on each side. This positioning gives you the best possible coverage. Once the rod is up, just thread your curtains and pull them snug against the walls. Done.
Installing Blackout Blinds
Properly installed blinds can offer a sleek, highly effective blackout solution. They’ve become so popular that the global market is expected to hit USD 6.15 billion by 2033. Here in the U.S., where millions of people are looking for ways to block light, the market is already over USD 1.2 billion.
For a grow room, you’ll want inside mount blackout cellular shades or blinds that come with side channels.
- Inside Mount: To get a perfect fit, measure the inside width of your window frame at the top, middle, and bottom, then use the narrowest measurement of the three. Do the same for the height. This ensures the blinds will fit inside the frame without snagging.
- Side Channels: These are basically adhesive tracks you stick to the sides of the window frame. The edges of the blinds slide right into these channels, creating a seal that stops any light from leaking around the edges.
Installation is usually pretty straightforward. Just screw the brackets into the top of the window frame, snap the headrail into place, and install the side channels if you’re using them. It’s a clean look that’s incredibly effective.
Making DIY Foam Board Inserts
This is the ultimate budget friendly and renter safe method. It’s cheap, ridiculously effective, and leaves absolutely zero marks behind. All you need is a sheet of rigid foam insulation, a utility knife, and the measurements you took earlier.
Using the inside measurement of your window frame, carefully mark the dimensions on your foam board. Use a straight edge, like a yardstick or a level, to guide your utility knife for a clean, straight cut. The goal is to make the board just big enough to wedge snugly into the frame.
If you cut it right, the friction alone should hold it in place perfectly. For extra convenience, you can add a couple of small pull tabs made from duct tape to make it easier to pop in and out. To boost efficiency, you can even paint the side facing the glass white to reflect heat and light, which helps keep your grow room a bit cooler.
No matter which method you pick, taking your time with the installation is the most important part. A sloppy job will lead to light leaks, and that’s the one thing we’re trying to avoid. Getting this step right sets the foundation for a perfect growing environment where your plants can thrive without interruption. A little patience now will pay off big time when you’re looking at a healthy, heavy harvest.
How to Find and Fix Every Last Light Leak
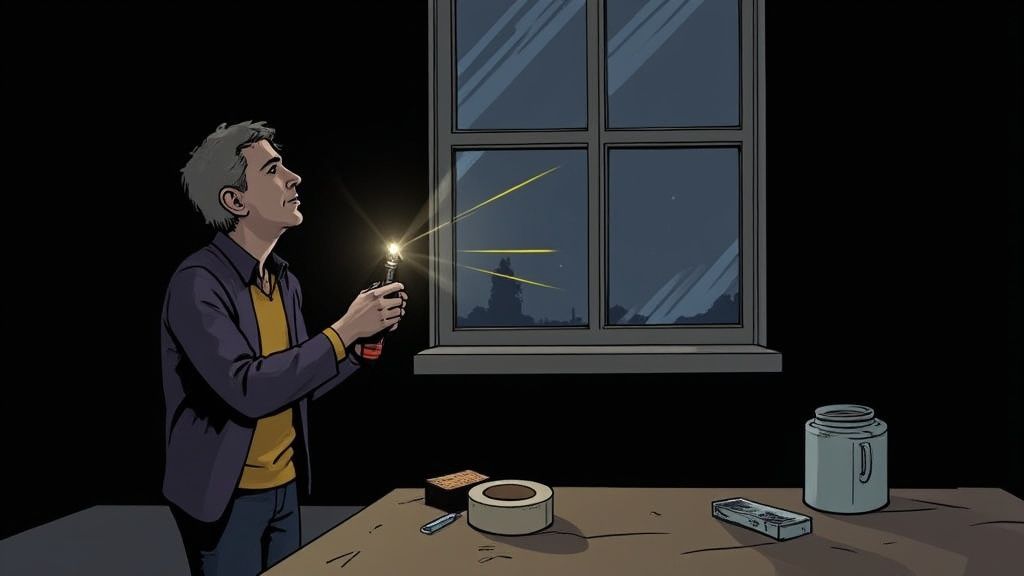
So you’ve got your main blackout material up and it’s looking good. High five. But don’t crack a beer just yet, because the job isn’t quite finished. The real difference between an okay grow room and a great one is in the tiny details, and that means hunting down every last, sneaky light leak.
We’re talking about those almost invisible cracks and gaps that let in just enough light to mess with your plants’ sleep schedule. It could be a sliver of light under the window, a crack in the frame, or even light coming through a keyhole on a nearby door. Chasing these down is what separates the pros from the rookies.
Becoming a Light Leak Detective
Your eyes are your best tool for this job, but they need a little help. You can’t just flip the lights off and expect to see every pinhole leak right away. You have to give your eyes time to adjust to the dark, a process known as dark adaptation.
Here’s the most effective way to test your work:
- Go into your grow room during the brightest part of the day.
- Kill all the lights inside the room.
- Sit down somewhere comfortable and just chill for at least 10 to 15 minutes. Seriously, don’t look at your phone.
After that time, your eyes will have fully adjusted, and any little bit of light getting in will stick out like a sore thumb. You’ll be surprised at what you find. Scan every inch of the window frame, the floor, the ceiling, and any doorways.
Common Hiding Spots for Light Leaks
Light is tricky and will find any path it can. From my experience, leaks almost always show up in the same few spots. When you’re doing your dark room test, pay extra close attention to these areas.
- Around the Window Frame: This is the most common culprit. Tiny gaps between the wall and the window trim are notorious for letting light seep through.
- The Bottom of the Window: A gap between the window sill and your blackout material is another classic leak spot.
- Corners and Seams: If you used panda film or another sheeting material, the corners and any seams where pieces overlap are prime leak zones.
- Doorways: Don’t forget about the door to the room. Light can easily sneak in under the door or around the frame.
A truly blacked out room is the foundation of a stress free environment for your autoflower and feminized cultivars. Taking an extra 30 minutes to seal every tiny leak is one of the highest return investments you can make in your grow.
Simple Fixes for a Perfect Seal
Once you’ve identified the culprits, fixing them is usually pretty easy and cheap. You don’t need to be a construction expert. Just grab a few basic supplies from the hardware store, and you’ll be set.
Here are the best tools for the job:
- Weatherstripping: This adhesive foam tape is perfect for sealing gaps around window frames and doors. It’s cheap, easy to apply, and creates a soft, light proof seal.
- Black Caulk: For more permanent cracks or gaps between the window trim and the wall, a bead of black or paintable caulk is your best friend. It fills the gap completely and dries to a solid, light blocking finish.
- High Quality Lightproof Tape: Something like black gaffer tape or heavy duty gorilla tape is a must have. It’s perfect for taping down the edges of panda film or quickly patching up any small holes or tears.
Go through your room and systematically seal up every leak you found during your test. Once you think you’ve got them all, do one more 15 minute dark room test just to be absolutely sure. This final check makes sure your plants will have the perfect, uninterrupted darkness they need to produce an amazing harvest.
Keeping Your Grow Room Safe and Discreet

Once you’ve successfully blacked out your windows and sealed every last leak, you’ve essentially created a locked down, sealed environment. That’s awesome for your plants, but now we need to talk about the bigger picture: keeping your grow space safe, discreet, and functional.
A totally blacked out window can look a little suspicious from the outside. During the day, windows normally have some reflection or show curtains. A solid black square can draw the wrong kind of attention, so it’s smart to think about how it looks to your neighbors.
Making It Look Normal from the Outside
You don’t want your hard work to scream “grow room inside.” The trick is to make the blacked out window look like any other window from the street. It’s all about creating a normal looking facade.
Here are a few simple ways to keep things low key:
- Add Normal Curtains: The easiest trick in the book. Just hang a regular set of blinds or curtains on the inside of your blackout material. From the outside, all anyone will see is a normal window treatment.
- Use White Backed Material: If you’re using something like panda film or foam board, make sure the white side faces the glass. This looks much more natural from the exterior than a solid black surface.
This little bit of effort helps you blend in and keeps your private hobby, well, private.
Keeping your grow discreet is just as important as keeping it dark. A simple set of decoy curtains is a cheap and effective way to maintain a normal appearance from the outside, making sure no one gives your setup a second look.
Why Ventilation Is a Big Deal
Okay, this part is a must. When you seal up a room to make it light proof, you also stop air from moving in and out. This traps heat, humidity, and stale air, creating a ton of problems for your plants and even for your house.
Your grow lights produce a lot of heat. Without any airflow, the temperature in your sealed room can skyrocket, stressing your plants and potentially stalling their growth entirely.
Good air circulation helps with a few key things:
- Temperature Control: It pulls hot air out and brings cooler, fresh air in.
- Humidity Management: It prevents moisture from building up, which can lead to mold and mildew on your plants and walls.
- Fresh Air for Plants: Your plants need fresh CO2 to thrive, and good circulation delivers it right to them.
Simple Ways to Manage Airflow
You don’t need a crazy expensive setup to get your air moving. A simple intake and exhaust fan can make a world of difference. An exhaust fan placed high in the room will pull out the hot, stale air. An intake vent or a small fan placed low on the opposite side of the room will bring in fresh, cool air.
This constant exchange keeps the environment stable and gives your plants the fresh air they need to flourish. It’s a basic principle that has a massive impact on your final results.
A Quick Word on Odor Control
Let’s be real, flowering cannabis has a very distinct smell. Being a good neighbor means keeping that aroma contained, and this is where your ventilation setup does double duty.
By attaching a carbon filter to your exhaust fan, you can scrub the air clean before it ever leaves the room. The air gets pulled through the filter, which traps all the odorous particles, leaving only clean, smell free air to be vented outside. For a more detailed look, you can learn more about how to get rid of that weed smell in our other guide. These are the finishing touches that make a grow room effective, safe, and completely discreet.
Common Questions About Blacking Out Windows
Still have a few things on your mind? No worries. We get questions all the time from people dialing in their grow room. Let’s tackle some of the most common ones and get you the straight answers.
Can I Just Use Black Paint on My Windows?
Technically, you could, but honestly, it’s a pretty terrible idea for a few reasons.
For one, it’s incredibly permanent and a massive headache to scrape off later, which can absolutely ruin the glass. It’s also tough to get a perfectly even coat, meaning it often looks streaky and might not even block 100% of the light.
Plus, let’s be real, a black painted window just looks strange and obvious from the outside. If you’re looking for a permanent solution, a quality blackout window film is far more effective and looks much cleaner.
Will Blacking Out My Windows Cause Them to Crack?
This is a legit concern, especially for growers in hot, sunny climates. The theory is that a black surface absorbs a ton of heat. This can create a big temperature difference between the hot glass and the cooler frame, potentially leading to a thermal stress crack. While it’s not an everyday occurrence with standard residential windows, it’s definitely possible.
To play it safe, here’s what I recommend:
- Use materials with a white backing facing the glass, like panda film or foam board you’ve painted white on one side. The white surface reflects heat instead of absorbing it.
- Leave a small air gap between your blackout material and the window pane. This little bit of space helps with air circulation and heat dissipation.
- If you’re really worried about it, blackout film is often designed specifically to manage thermal stress, making it a much safer bet.
Is It Okay to Cover Only Part of the Window?
Nope. This is an all or nothing situation.
Even if you cover most of the window, any light that sneaks through the uncovered spots completely defeats the purpose. Your plants’ dark cycle needs to be absolute darkness, not “mostly dark.”
Remember, the goal is to trick your plants into thinking it’s the dead of night. Any light, no matter how small, can break that illusion, stress them out, and potentially trigger hermaphroditism or mess up their flowering schedule. Cover the entire window, from edge to edge, and then seal the perimeter.
Getting your lighting environment perfect is the first step to a killer harvest. When you invest in top shelf feminized or autoflower cultivars, you want to give them the best possible conditions to show off their genetics. Taking the time to properly black out your windows makes sure you’re not leaving any potential on the table. It’s a simple step that pays off big time.
Ready to grow some amazing plants in your perfectly dark room? Pacific Seed Bank has over 1,400 cultivars of premium, lab-tested feminized and autoflower seeds waiting for you. Find your next favorite strain here at Pacific Seed Bank.


