So, you checked the paper towel, and there it is: a tiny white taproot peeking out. Congrats, your seed has officially popped! This is go-time, and knowing exactly what to do next is what separates a strong start from a weak one.
Your Seeds Popped, Now What Do You Do?
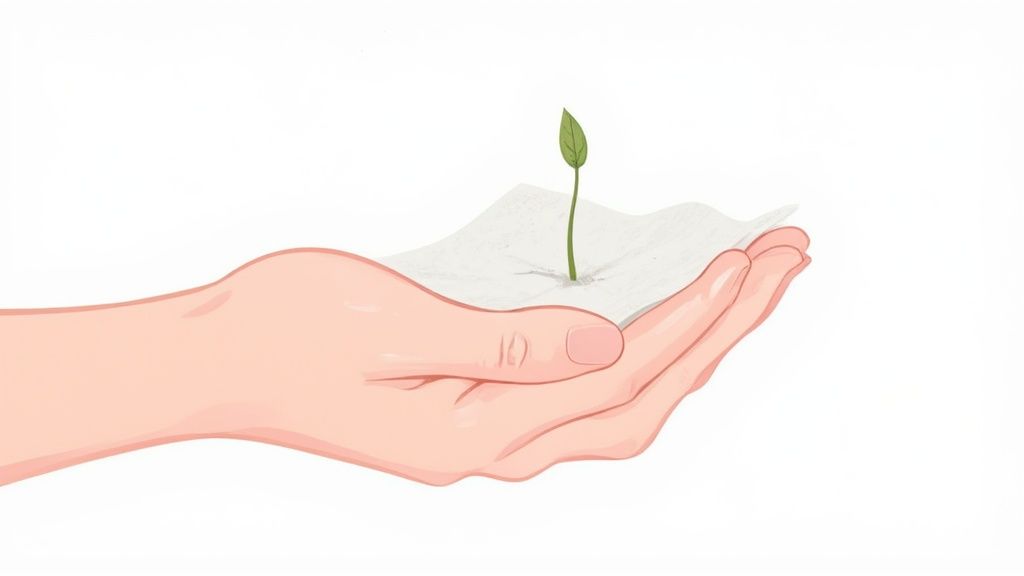
Alright, that little sprout is your green light. The germination phase is over, and it’s time to move that delicate little thing into its first real home. This is a critical step because how you handle the seed now can make or break your plant’s future health. Don’t stress, though. You’ve got this. It just takes a gentle hand and a little know-how.
Think of this as your seedling’s first big move. Just like you wouldn’t want a rough moving day, your seed needs a stress free transition. The goal is simple: get it from the paper towel (or whatever you used) into its new pot without damaging that brand new taproot. If you need a refresher on getting to this point, our guide on how to germinate marijuana seeds for beginners is a great resource.
From Sprout to Soil
The key here is a “less is more” approach. That taproot is incredibly fragile, so you want to touch it as little as humanly possible. This isn’t just a cannabis thing; it’s a basic principle in horticulture.
Even in the massive global vegetable seed market, professional nurseries treat pre-germinated seeds with extreme care to maximize their success rates. They plant high value crops into trays at a careful depth of 0.5–1.5 cm. This simple technique can reduce seed usage by 20–30% and cut down on seedling losses compared to just tossing dry seeds into the ground.
The whole point is to give your seedling the easiest path to success. By handling it carefully and planting it correctly, you’re removing the first major obstacle it would face: struggling to survive the transplant.
For a quick reference, here’s a simple breakdown of the process.
Quick Guide to Planting Your Sprouted Seed
| Action | What to Do | Why It Matters |
|---|---|---|
| Prepare the Pot | Moisten your medium (soil, coco) before planting. It should be damp, not soggy. | Prevents the fragile taproot from drying out or being displaced by a heavy stream of water. |
| Make the Hole | Use a pencil eraser or your pinky to create a small hole, about 0.5–1.5 cm deep. | The perfect depth helps the seedling push through the surface without wasting energy. |
| Handle with Care | Use tweezers to gently pick up the seed by its shell, avoiding the taproot entirely. | The taproot is the plant’s lifeline. Even the slightest damage can stunt its growth or kill it. |
| Plant It | Place the seed into the hole with the taproot pointing down. | This orients the plant correctly, so the roots grow down and the stem grows up toward the light. |
| Cover Lightly | Loosely cover the seed with a pinch of your growing medium. Don’t pack it down. | Loose soil allows the seedling to emerge easily and lets air circulate around the new roots. |
Following these steps sets the stage for a healthy seedling.
We’re going to cover the immediate dos and don’ts that separate a thriving seedling from one that struggles right out of the gate. This guide will walk you through moving your germinated autoflower or feminized seeds into their first home, setting them up for a strong and healthy start. Let’s get your grow started on the right foot.
Choosing the Right First Home for Your Seedling
Alright, let’s talk real estate for your tiny new plant. Where your germinated seed starts its life is a huge deal. Picking that perfect first home, whether it’s a simple cup, a peat pellet, or its final forever pot, sets the stage for everything that follows. I’m going to break down the options so you can figure out what works for your setup and growing style.
First things first, what are you planting in? The container is just one part of the equation; the stuff you fill it with is just as important. You need a growing medium that’s light and airy. Seedlings need to push their brand new roots through it without a struggle, so dense, heavy soil is a major no go.
Picking the Perfect Potting Medium
You have a few solid choices for what to plant your germinated seeds into. The goal here is to create a cozy, welcoming spot that encourages strong root growth right from the very beginning.
- Seed Starting Mix: This is the obvious choice. It’s specifically designed to be light, fluffy, and low in nutrients. Big name potting soils can be too “hot” for seedlings, meaning they have too much fertilizer, which can easily burn the delicate new roots.
- Coco Coir: Made from coconut husks, coco coir is a fantastic, sterile alternative to soil. It holds moisture well but also allows for great aeration, which roots absolutely love. It’s a personal favorite for starting seeds.
- Peat Pellets: These are little compressed discs of peat moss that expand when you add water. They are super convenient because you just plant the whole pellet when it’s time to transplant, minimizing root shock.
Whatever you do, do not grab dirt from your backyard. Garden soil is heavy, compacts easily, and is often full of pests and fungi that can quickly kill a fragile seedling. Stick to a clean, sterile medium to give your cultivars the best shot. If you want to get into the details, we’ve got a whole guide on how to choose the right cannabis growing medium that breaks it all down.
One non negotiable feature for any container is good drainage. Soggy roots are a fast track to problems like root rot. Your seedling’s roots need oxygen, and waterlogged soil suffocates them. It’s the number one mistake I see new growers make.
Container Size: To Start Small or Go Big
Now, let’s talk about the container itself. You have two main strategies here: start small and transplant later, or plant directly into the final, large pot. Each has its pros and cons, and the right choice often depends on the type of cultivars you’re growing.
Starting Small (Solo Cups, Peat Pellets, Small Pots)
This is the traditional method. Starting in a small container, like a classic red solo cup with holes poked in the bottom, makes it much harder to overwater. Since there’s less soil volume, it dries out faster, which is great for root development in the early stages.
The downside? You’ll eventually have to transplant your seedling into a bigger pot. This can stress the plant if not done carefully, and for some cultivars, that stress can be a problem.
Planting in the Final Pot
This method is exactly what it sounds like. You plant your germinated seed directly into the big 5 or 7 gallon pot it will live in for its entire life. The main benefit here is that you avoid transplant shock completely.
This is especially relevant for our autoflower cultivars. Autoflowers have a short, fixed lifespan. Any stress, like a rough transplant, can stunt their growth, and they simply don’t have time to recover. By planting them in their final home from the start, you let them grow uninterrupted. The only tricky part is watering. You have to be super careful not to soak the entire pot, just the small area around the seedling, until it gets bigger.
For our feminized seeds, which are photoperiod, starting small is perfectly fine. They have plenty of time to recover from any transplant stress before you decide to flip them to flower.
The Perfect Planting Technique for Germinated Seeds
Alright, your seeds have popped and you’ve picked their first home. Now for the main event: getting that tiny sprout into its new medium. This is where the magic really starts, and while it’s not rocket science, a few small details can make all the difference. Get this part right, and your seedling will pop up in a day or two, strong and ready to go.
Let’s walk through exactly how to plant your germinated seed. By the end of this, you’ll be planting with total confidence, no more of that “am I doing this right?” anxiety.
Handling Your Delicate Seed
First things first: be gentle. That little white taproot is the most fragile part of the plant right now, and it’s incredibly sensitive. The natural oils on your fingers can harm it, and even the slightest pressure can cause irreversible damage. The golden rule is simple: do not touch the taproot.
A clean pair of tweezers is your best friend for this job. Use them to gently pick up the seed by its shell, treating it like a tiny, precious egg. You’re just moving it from point A to point B with as little drama as possible.
Getting the Depth Just Right
This is probably the single most common mistake new growers make: planting the seed way too deep. Your seedling has a finite amount of energy stored in its first two little leaves (the cotyledons) to push its way up through the soil and find light. Plant it too deep, and it can literally run out of gas before it ever breaks the surface.
So, how deep should you go? The sweet spot is only about 0.5 to 1.5 cm deep, which is roughly a quarter to a half inch. It’s much shallower than most people expect. An easy way to get it perfect is to just use the eraser end of a pencil. Gently press it into your pre moistened soil, and you’ve made the perfect little pocket.
This isn’t just some grower’s trick; it’s backed by proven agricultural science. Farmers in major rice producing regions, for instance, know that planting germinated seeds at a shallow depth of 1–2 cm leads to faster, more uniform emergence. You can read more about modern seed industry practices and see how the pros approach this critical stage.
The key takeaway here is to be gentle and shallow. You want to give your seedling the shortest, easiest path to the surface. Don’t make it work harder than it has to.
This quick visual shows the simple flow from picking a container to planting your germinated seed.
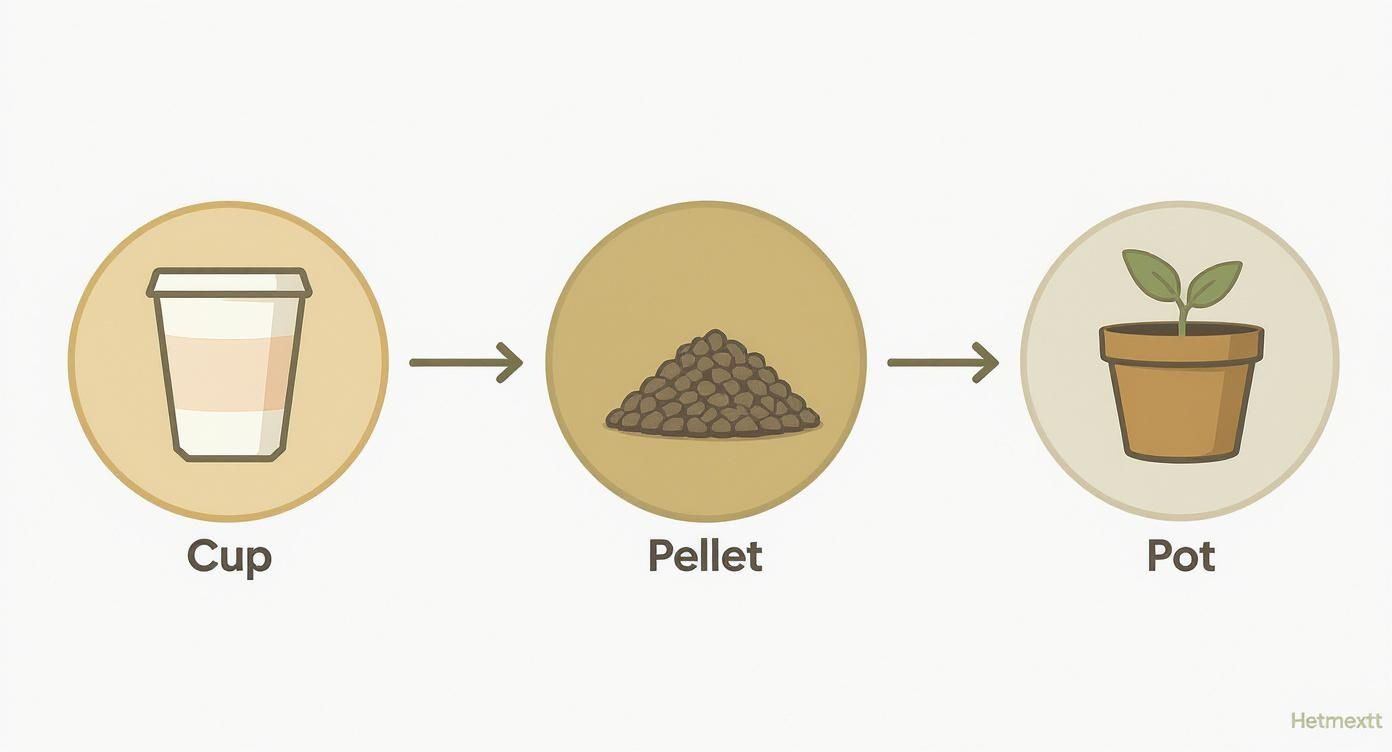
Whether you choose a simple cup or a dedicated pot, each option serves as a great starting home for your seedling.
Root Down, Stem Up
Now for the million dollar question: which way does the taproot go? You always want to plant your seed with the taproot pointing down. This is just basic biology. The root instinctively grows down into the soil to search for water and nutrients, while the head of the seed pushes up toward the light.
Once you’ve gently placed the seed in the hole, taproot down, all that’s left is to cover it. Don’t pack the soil down on top of it. Just loosely sprinkle a little bit of your growing medium over the seed. The seedling needs to be able to push through easily, and a light, airy covering is all it takes.
Here’s the whole process, simplified:
- Prep Your Tools: Grab a clean pair of tweezers and a pencil.
- Make the Hole: Gently press the pencil eraser into your moist medium to create a hole about 0.5 to 1.5 cm deep.
- Handle with Care: Using the tweezers, carefully pick up the germinated seed by its shell, making sure to avoid the taproot.
- Place the Seed: Lower the seed into the hole with the taproot pointing straight down.
- Cover Lightly: Gently brush a small amount of medium over the seed. Do not compact it.
And that’s it! The operation is delicate, but it’s not difficult. The entire focus is on being gentle and precise. Now, all you have to do is create the perfect environment for your new plant to pop its head up and say hello to the world.
Creating the Ideal Environment for Your Seedling
So, you’ve successfully planted your germinated seed. Awesome. Your job now shifts from surgeon to caretaker, and the goal is to create the perfect little environment for that seedling to thrive. It’s all about nailing the big three: water, light, and temperature.
Get this right, and you’ll see that little green shoot pop up in no time, strong and ready to go. This stage is your plant’s infancy. Just like a baby, it’s super sensitive and needs a cozy, stable environment to grow. We’re going to dial in the conditions to prevent common issues like stretching or damping off, which can take out a seedling before it even gets its first real leaves.
Watering Without Drowning
Overwatering is hands down the number one killer of seedlings. It’s a super common mistake because you feel like you should be doing something, but your little plant just doesn’t need that much water yet. Flooding the pot can suffocate the roots and create a breeding ground for fungus.
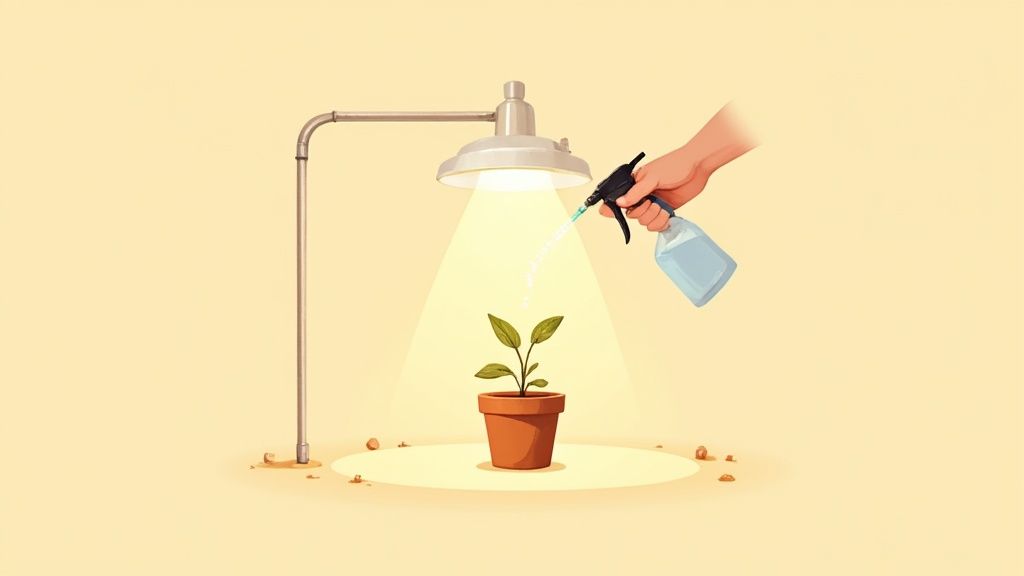
The best way to water a freshly planted seed is with a simple spray bottle. Just give the surface of the soil a few gentle mists to keep it damp but never soggy. You’re aiming for the consistency of a wrung out sponge. This technique keeps the seed moist enough to continue its journey without washing it away or compacting the soil around it.
Your main tool for the first week or so should be a spray bottle. It gives you total control and makes it almost impossible to overwater. You’re just keeping the top layer of soil moist, not soaking the whole pot.
Once the seedling sprouts, you can switch to watering a small circle around the base of the stem. This encourages the roots to spread out and search for water, which builds a stronger foundation for the plant.
The Right Kind of Light
Next up is lighting. A common misconception is that seedlings need an intense blast of light right away. They absolutely do not. Too much light intensity can stress or even burn a fragile seedling. At this stage, they’re much more sensitive than a mature plant.
You don’t need a high powered, thousand watt light to get started. In fact, that would be overkill. A simple fluorescent light (like a T5) or a low wattage LED grow light is perfect for the seedling stage. They provide the right spectrum of light without generating too much heat.
Here’s what you need to know about setting up your lights:
- Distance is Key: Keep your light source about 4-6 inches away from the top of your seedling if you’re using a T5 fluorescent. For LEDs, start around 12-18 inches and adjust based on the manufacturer’s recommendation.
- Watch for Stretching: If your seedling starts growing really tall and skinny, it’s “stretching” for light. This is a sign your light is too far away. Move it a little closer.
- Light Cycle: A light schedule of 18 hours on and 6 hours off is a solid standard for seedlings. This gives them plenty of light to photosynthesize and grow, plus a dark period to rest.
If you’re just getting started and want a deeper look at your first setup, we’ve got a great guide on the simplest starter grow setup for first-time cultivators that covers all the gear you might need.
Nailing the Temperature and Humidity
The final piece of the puzzle is creating a warm and humid atmosphere. Think of it like a little spa day for your plant. These conditions mimic the spring environment that seeds love, which encourages them to sprout and grow vigorously.
Your ideal ranges are:
- Temperature: Aim for a consistent 70-78°F (21-26°C).
- Humidity: Keep relative humidity high, around 60-70%.
Keeping the temperature stable is pretty straightforward with an indoor setup. But how do you keep the humidity up? The easiest way is with a humidity dome. You don’t need to buy anything fancy; a clear plastic cup or the top half of a plastic bottle placed over the seedling works perfectly.
Just remember to lift it off once or twice a day for a few minutes to allow for fresh air exchange. Once your seedling has developed its first set of true leaves, you can remove the dome for good.
Common Mistakes to Avoid After Planting

We’ve all been there. You followed every step to the letter, did everything right, and then one tiny misstep snowballs into a major headache. Let’s make sure that doesn’t happen to you.
Consider this your real talk guide to the most common slip ups people make right after planting their precious germinated seeds. Getting through these first couple of weeks is the hardest part of the entire grow. Nail this, and you’re pretty much golden. Think of it as learning from my mistakes, and everyone else’s, so you can sidestep the drama.
The Number One Seedling Killer: Overwatering
If one thing takes out more seedlings than anything else, it’s giving them too much water. It’s an easy trap to fall into. You’re excited, you want to nurture your new plant, and watering feels like the most nurturing thing you can do. But a tiny seedling in a big pot just can’t drink that much.
When you soak the medium, the roots can’t get any oxygen and they essentially drown. Soggy soil is also a five star resort for nasty stuff like fungus gnats and root rot. Your best bet for the first week is to use a small spray bottle to gently mist the surface. After that, water in a small ring around the seedling, not directly at the stem, to encourage its roots to stretch out and search for moisture.
My best advice is to wait until the top inch of the soil feels dry to the touch before you even think about watering again. When in doubt, just wait another day. Your seedling is tougher than you think and would much rather be a little thirsty than be drowning.
Planting Too Deep or Too Shallow
We touched on this before, but it’s so critical it’s worth repeating. Planting depth is a make or break detail. Pop your germinated seed too deep, and it might burn through all its stored energy trying to reach the surface, never to be seen again.
On the flip side, planting too shallow can cause “helmet head,” where the seed casing gets stuck on the cotyledons (the first little leaves). A shallow plant can also develop a weak, flimsy stem that just flops over. The sweet spot is about a half inch deep. A good rule of thumb is to make a hole about as deep as the first knuckle on your pinky finger.
This isn’t just a cannabis thing; it holds true across agriculture. Even in large scale farming, planting corn seeds at the correct depth of 3–5 cm into moist soil is crucial for uniform emergence. You can discover more insights about seed market trends to see just how vital this single factor is for success.
Being Too Eager with Lights and Nutrients
Your seedling is a baby. You wouldn’t feed a newborn a steak, would you? Same logic applies here. It’s incredibly tempting to blast it with powerful lights and start pumping it full of nutrients, thinking you’re giving it a head start. In reality, you’re just setting it up for failure.
Here’s how to curb that enthusiasm:
- Lighting: Seedlings do not need intense light. A simple, low wattage LED or a T5 fluorescent light is more than enough. Keep it a safe distance away to avoid burning the delicate leaves. If the seedling starts stretching and getting tall and skinny, your light is too far away. If the leaves look pale or scorched, it’s too close.
- Nutrients: Your seedling has a packed lunch ready to go. Everything it needs to get started is stored right inside its first two leaves, the cotyledons. Don’t even consider adding nutrients until it has developed at least two or three sets of “true” leaves. Even then, start with a very light, quarter strength solution.
Forgetting to Have Patience
The final mistake is simply being impatient. After you plant your seed, you might be peering into the pot the very next day, expecting to see a sprout. Sometimes you get lucky, but other times it can take three, four, or even five days. Don’t panic and start digging around to see what’s going on.
Prodding the seed or seedling at this fragile stage is a huge no no. Your only job is to maintain the right environment (warm, humid, and gently lit) and let nature handle the rest. Each of your cultivars is on its own schedule. Just relax, trust the process, and let your new plant emerge when it’s good and ready.
Questions We Hear All the Time
Still have a few questions bouncing around? Good. Every grower has them, and we get asked these all the time. Let’s tackle some of the common hangups so you can move forward with total confidence.
How Long Should the Taproot Be Before I Plant It?
It’s exciting to see that first little root pop out, but don’t get carried away. Longer isn’t better here. The sweet spot for planting is when the taproot is just a quarter inch to a half inch long.
If you let it go much further, the root gets incredibly fragile and becomes a real pain to handle without snapping it. A long, dangly root is also way more likely to get bent, tangled, or damaged when you’re trying to ease it into the soil. Aim for a short, sturdy little root that you can plant without a struggle.
What if My Seedling Never Pops Up?
This is a real bummer, but it happens to the best of us. If a week has passed and there’s still no sign of life, it’s usually one of a few things.
- You planted it too deep. The little seedling simply ran out of steam before it could push its way to the surface.
- You overwatered it. Too much water can literally drown the seed or cause it to rot before it even has a chance.
- It was a “dud” seed. Even with the best genetics, it’s rare, but sometimes a seed just doesn’t have what it takes to get going.
Whatever you do, don’t go digging for it! Poking around in the soil will only make things worse and kill any slim chance the seedling might have had. The best move? Chalk it up as a loss and start germinating a new seed. It’s all part of the learning curve.
The most important thing to remember is patience. Your job is to create the right environment, then step back and let nature do its thing. Trust the process and try not to overthink it.
Help! My Seedling Sprouted and Immediately Fell Over.
Ah, the classic “stretch.” This happens when a seedling shoots up too tall, too fast, leaving it with a weak, lanky stem that can’t hold itself up. The number one cause is the light source being too far away, forcing the plant to desperately reach for it.
You might be able to save it. Try propping the stem up with something small like a toothpick, or carefully mound a tiny bit of extra soil around the base to give it some support. More importantly, get that light source closer to your plant to stop the stretching in its tracks. Don’t feel bad, this is a textbook rookie mistake.
Can I Plant a Germinated Seed Directly into Its Final, Big Pot?
Yes, you absolutely can. In fact, for certain types of plants, it’s the only way to go. If you’re growing autoflowers, planting them straight into their forever home is standard practice.
Autoflowers operate on a fixed, internal clock. Any kind of stress, especially the shock of being transplanted from a small pot to a bigger one, can stunt their growth permanently. Since they’re on such a tight schedule, they don’t have time to recover from that kind of setback, which almost always means a smaller plant and a lighter harvest. Starting them in their final container lets you sidestep transplant shock entirely.
Ready to put this knowledge to work with some of the best seeds out there? At Pacific Seed Bank, we have hundreds of premium autoflower and feminized cultivars ready to go. Take a look at our huge selection and get your next grow started today.


