Knowing how to raise the pH of your water is pretty easy: you add something alkaline like baking soda or a commercial pH Up solution, give it a stir, and test it again. The real art is understanding why you’re doing it and hitting that perfect balance for your plants.
Why Your Water’s pH Is a Big Deal for Cannabis
Alright, let’s get right to it. You’ve got your Pacific Seed Bank autoflower seeds, your grow tent is dialed in, but your plants just look… off. Before you start blaming the genetics, let’s talk about something that’s easy to overlook but super important: your water’s pH.
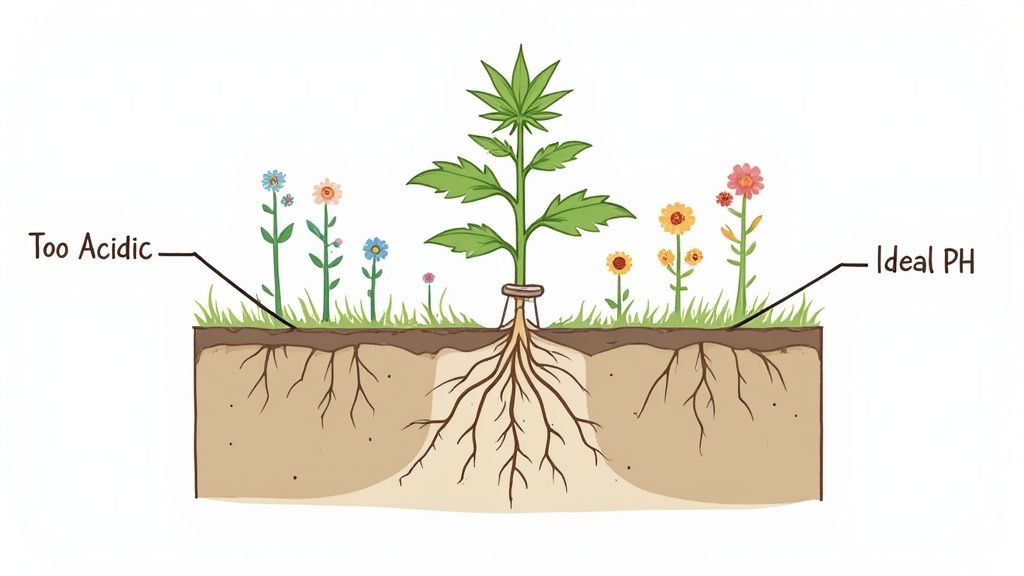
Think of pH as the gatekeeper for nutrients. If the gatekeeper is in a bad mood, meaning the pH is too low or too high, it won’t let the good stuff through. Your plant’s roots simply can’t absorb the food you’re giving them. This is called nutrient lockout, and it’s one of the most common reasons growers see problems even when they’re feeding their plants plenty.
Basically, pH controls how available different nutrients are to your plant’s roots.
The Sweet Spot for Healthy Roots
The perfect pH isn’t one specific number; it’s a range. And that range shifts depending on whether you’re growing in soil or a soilless setup like hydroponics. Nailing this is a total game changer for your harvest.
- Growing in Soil: For a soil grow, you’re aiming for a pH between 6.0 and 7.0. Soil is a great natural buffer, which means it helps prevent wild pH swings and gives you a bit more leeway. The healthy microbial life in good soil also plays a huge role in making nutrients accessible.
- Growing in Hydroponics: If you’re in a soilless medium like coco coir or a full hydro system, your target is a bit more acidic, usually 5.5 to 6.5. Without soil to act as a buffer, the pH of your water has an almost immediate effect on the root zone.
Here’s the bottom line: When your water’s pH is in the right zone, your plants can feast on all the essential nutrients you provide. When it’s out of whack, they’re starving, no matter how much you feed them.
What Happens When pH Is Off
If your pH drifts too low (too acidic), your plants will have a hard time absorbing key macronutrients like calcium and magnesium. You’ll likely see telltale signs like yellowing leaves or stunted growth. On the flip side, if the pH is too high (too alkaline), they’ll struggle to take in micronutrients like iron and manganese.
This is exactly why just throwing more nutrients at the problem often makes things worse. You’re just piling on more food the plant can’t eat, which can create even more imbalances and stress in the root zone. Understanding the complete picture of nutrients for cannabis plants is essential, and it all starts with getting the pH right.
Taking the time to manage your pH can be the difference between a sad, sparse harvest and a canopy overflowing with dense, frosty buds. We’re setting the stage here so you get the ‘why’ before we get into the ‘how’. Trust me, once you understand why pH is so important, staying on top of it becomes second nature.
How to Get an Accurate pH Reading
You can’t fix what you can’t measure. Guessing your water’s pH is like trying to grow with a blindfold on, and frankly, nobody has time for that. Getting a solid, reliable reading is the first real step in learning how to properly dial in the pH of your water.
This is where you make sure every adjustment is based on real data, not just a hunch. It’s foundational stuff, and getting it right makes all the difference for your plants.
Choosing Your pH Testing Tool
When it comes to measuring pH, you’ve basically got two main options: old school test strips or a modern digital meter. Both will give you a number, but they are not created equal. Let’s break them down.
- pH Test Strips: These are the little paper strips you dip in your water. They change color, and you match that color to a chart on the package. They’re cheap and super easy to find.
- Digital pH Meters: This is a handheld electronic device with a probe on the end that you stick in the water. It gives you a precise digital reading, often down to a tenth or even a hundredth of a point.
For a beginner, strips are better than nothing. They’ll tell you if your water is way off. But they can be tough to read accurately, and that “close enough” approach can cause headaches for certain cultivars that are a bit more sensitive.
A digital meter is a worthy investment. The accuracy is just on another level. That precision is what you need when you’re aiming for that perfect 5.5 to 6.5 range in a hydro setup.
The Most Skipped Step: Calibrating Your Meter
Okay, listen up, because this is the part almost everyone messes up. If you get a digital meter, you absolutely must calibrate it. Skipping this is like using a scale that starts at 5 pounds; all your measurements will be wrong from the get-go.
Calibration means you’re “teaching” your meter what a specific pH level actually looks like. You do this using special calibration solutions, which are liquids with a precise, stable pH. They usually come in pH 4.0, 7.0, and sometimes 9.18.
Most meters require a two-point calibration. This means you’ll dip the clean probe in the pH 7.0 solution, let it stabilize, and press the ‘calibrate’ button. Then you’ll rinse it and repeat the process with the pH 4.0 solution. It’s that simple.
My personal routine? I calibrate my meter once a month, religiously. If I ever accidentally drop it or let the probe dry out, I calibrate it again immediately. It takes five minutes and saves me from massive headaches down the road.
Getting a Clean and Correct Reading
Once your meter is calibrated and ready to go, the process is simple. But a few small details ensure you get the right number every single time.
- Mix Your Nutrients First: Always, always, always add your nutrients to your water before you test the pH. Nutrients themselves can drastically change the pH, so testing plain water first is pretty much pointless.
- Stir and Wait: After adding nutrients or any pH adjuster, give the water a really good stir to make sure everything is evenly mixed. Let it sit for a few minutes to stabilize before you take a reading.
- Rinse and Read: Rinse the meter’s probe with plain tap or distilled water before dipping it into your nutrient solution. Submerge the tip, give it a gentle swirl, and wait for the reading on the screen to stop bouncing around. That’s your true pH.
The whole world of water quality is a big deal. The water testing market is currently valued at $4.13 billion and keeps growing, which just shows how important monitoring is for everything from public health to growing amazing plants. You can find out more about how global water quality is tracked and its impacts from the European Environment Agency.
How to Raise the pH of Water
So, your pH test came back low. What now? Time to nudge that number back up so your plants can start feeding properly again.
Let’s walk through the most common ways to raise your water’s pH. We’ll start with the stuff you find at the grow shop and then cover a few DIY options you might already have in your kitchen. The idea is to find what works best for your setup, your budget, and your specific plants.
Commercial pH Up Solutions
Step into any grow store, and you’ll see bottles of “pH Up” lining the shelves. This is the go to for countless growers, and for good reason. These products are formulated specifically for plant cultivation, meaning they’re stable, concentrated, and get the job done reliably.
The active ingredient is almost always potassium hydroxide. It’s a powerful base that raises pH quickly without throwing a bunch of junk into your nutrient solution. Seriously, a few drops are often enough for a whole gallon, so one little bottle can last a surprisingly long time.
Using a commercial solution is predictable and straightforward. You’re not left guessing how much to use, and the results are incredibly consistent. That consistency is a huge advantage, especially when you’re dialing things in for your prized autoflower or feminized seeds.
The biggest win with commercial pH Up is its stability. Unlike some home remedies, it’s far less likely to let your pH drift back down after a day or two, giving your roots the steady environment they need to thrive.
This is especially critical in hydroponic systems where pH can swing on a dime. A stable adjuster means less time fiddling with your reservoir and more time watching your plants stack.
The Go-To DIY Method: Baking Soda
Now for the most famous household pH adjuster: baking soda. Yep, the same box you use for baking or keeping the fridge fresh. Baking soda, or sodium bicarbonate, is a quick and dirt cheap way to raise pH in a pinch.
It’s available everywhere, and it definitely works. The process is exactly what you’d expect: dissolve a tiny bit in your water, give it a good stir, and test again. The main drawback? It’s not nearly as stable as potassium hydroxide, so you might find your pH creeping back down, forcing you to re-adjust more often.
Generally, adding about 1 teaspoon of baking soda per gallon of water can bump the pH by 0.1 to 0.3 units, though this depends on your water’s starting point. It’s a great trick to have in your back pocket. For a deeper look into water chemistry management, the European Environment Agency offers some fascinating insights.
Other Natural and Organic Options
For soil growers leaning toward a more organic approach, a few other options exist. These methods are typically slower to act but are great for amending your soil’s pH over the long haul while providing other perks.
A couple of popular natural choices include:
- Potassium Silicate: Often sold as a silica supplement, this stuff doesn’t just raise pH; it also reinforces your plant’s cell walls. Stronger cells make for plants that are way more resilient against pests and environmental stress. It’s a true win-win.
- Wood Ash: If you’ve got access to clean, untreated hardwood ash, it can be a powerhouse soil amendment. It’s highly alkaline and loaded with potassium and calcium carbonate. Just be careful, as a little goes a very long way. This is strictly for soil; don’t even think about putting it in your hydro reservoir.
These natural methods are perfect for building a healthy, living soil ecosystem. They work with the microbes in your soil to create a stable, long term pH balance, which is the ultimate goal for a happy, thriving root zone. Just remember they’re marathon runners, not sprinters; don’t count on them for immediate, drastic adjustments.
Here’s a quick look at how these different methods stack up.
Comparing Methods to Raise Water pH
| Method | Best For | Pros | Cons |
|---|---|---|---|
| Commercial pH Up | All grow types, especially hydroponics | Highly stable, concentrated, predictable results | Costs more than DIY options, less “organic” |
| Baking Soda | Quick fixes, emergencies, soil growers on a budget | Cheap, widely available, easy to use | Not very stable, can cause pH swings |
| Potassium Silicate | Soil and hydro growers looking for extra benefits | Raises pH and strengthens plants | Slower-acting than pH Up, more expensive |
| Wood Ash | Organic soil growers building long-term soil health | Natural, adds potassium and calcium | Not for hydro, easy to overuse, slow-acting |
Choosing the right method often comes down to your growing style. For precision and stability, especially in hydro, nothing beats a commercial solution. But for a quick fix in a soil grow, baking soda or wood ash can get you out of a jam.
A Practical Guide to Adjusting Your pH
This is the exact moment where so many growers mess up. They see a low pH reading, start to panic, and just dump a ton of pH Up into their water. The result? The pH goes flying in the other direction, and now they have a whole new problem.
That’s a massive mistake.
This part is all about making small, careful adjustments. Patience is your best friend when you’re trying to raise the pH of water without stressing out your plants. The goal is to gently nudge the pH into the right range, not shock the whole system. A calm, steady approach leads to a stable root zone, which is exactly what your cultivars need to thrive.
The Gentle Approach to pH Adjustment
Forget about getting it perfect on the first try. The key is to work in small increments. Add a tiny bit of your chosen pH adjuster, stir it in really well, and then give it a few minutes to fully dissolve and mix. After that, test your water again.
Here’s a real world example: When I’m mixing a 5-gallon bucket of nutrients and the pH is sitting at, say, 5.2, I’ll start with just 1-2 milliliters of commercial pH Up. I add it, stir for a good minute, wait five more, and then test. More often than not, that small dose is enough to get me close to my target.
The rule of thumb is simple: It’s always easier to add a little more than it is to fix a big overcorrection. Going overboard sends your pH on a rollercoaster, which is super stressful for your plant’s roots.
This flowchart shows a few common options for raising your water’s pH, from commercial products to stuff you might find in your kitchen.
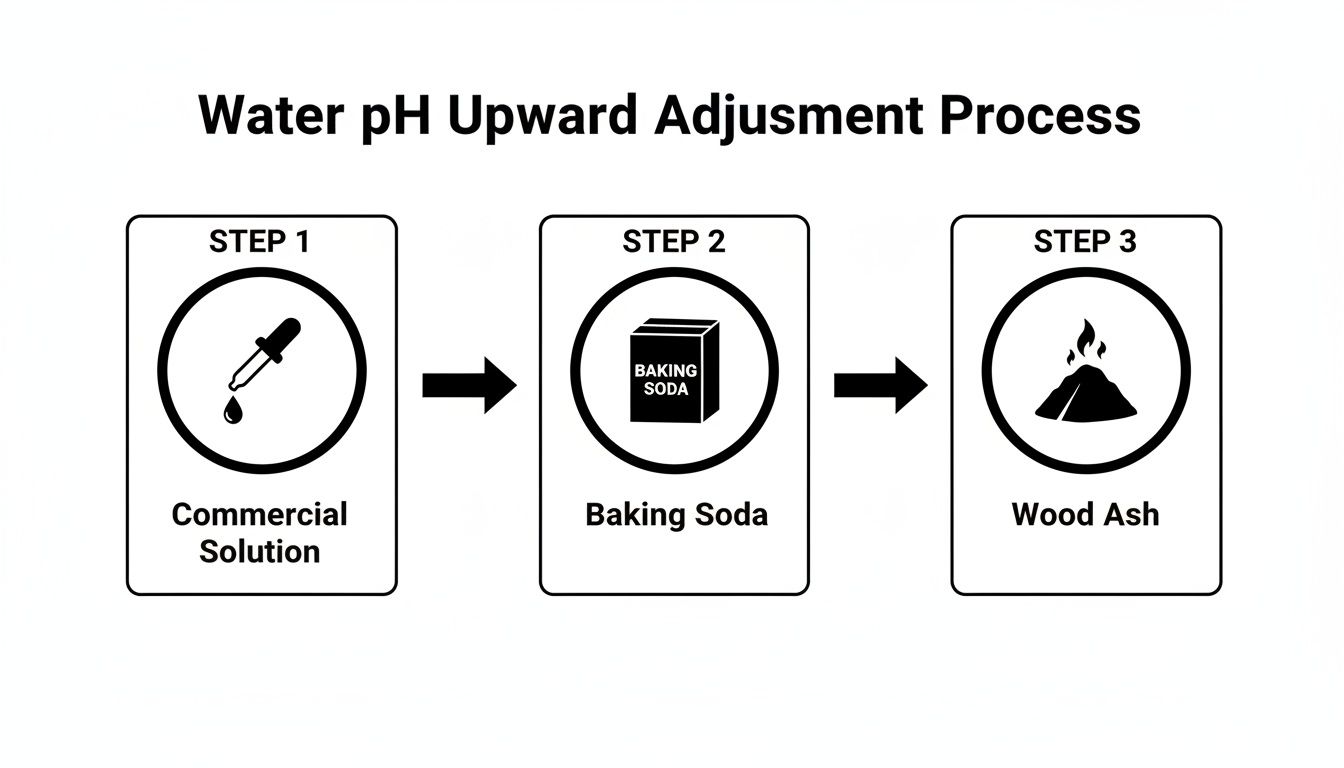
As you can see, each method has its place. But for precision and stability, commercial solutions are usually the most reliable for consistent results.
Avoiding the Dreaded pH Bounce
One of the most frustrating things you can run into is something called pH bounce. This is when you adjust your pH to the perfect level, only to check it a few hours later and find it has swung right back to where it was, or even further away.
This usually happens for a couple of reasons:
- Low Buffering Capacity: If you’re using reverse osmosis (RO) or distilled water, it has very little “buffering” ability. This means there’s nothing in the water to resist pH changes, so even tiny additions can cause wild swings.
- Unstable Adjusters: Some DIY methods, like baking soda, are less stable in a solution than commercial products. They can raise the pH initially, but it might not hold steady for very long, especially in a hydroponic reservoir.
If you’re dealing with pH bounce, the first thing to check is your water source. Using RO water is great, but you might need to add a Cal-Mag supplement to it first. The calcium and magnesium act as buffers, giving your water the stability it needs to hold a consistent pH after you adjust it. It’s also important to remember how your medium affects pH. For more on that, you can check out our guide on how to choose the right cannabis growing medium.
Dosing and Mixing Best Practices
So, what does this slow and steady process actually look like? Let’s put it all together.
- Start with Your Nutrients: Always add all your base nutrients, boosters, and supplements to your water before you even think about pH. Everything you add will affect the final reading.
- Get an Initial Reading: Once everything is mixed, take your first pH measurement. This is your starting point.
- Add a Small Amount: Based on your starting pH and the size of your reservoir, add a very small amount of your pH Up solution. A little goes a long way.
- Mix Thoroughly: Stir the water for at least a minute. You want to make sure the adjuster is evenly distributed throughout the entire solution.
- Wait and Re-test: Give it about 5-10 minutes to settle, then test the pH again. If it’s still too low, repeat the process with another tiny dose.
It might feel tedious at first, but this careful process is what separates growers who fight with their plants from those who get amazing results. By taking your time, you keep the root environment stable and happy, allowing those beautiful feminized and autoflower plants to focus on what they do best.
Troubleshooting Common pH Issues

So, you’ve been carefully measuring and adjusting, but your pH just won’t stay put. It’s a super common headache for growers, so don’t sweat it. Even when you feel like you’re doing everything right, pH can be a tricky beast to tame. Let’s dig into the most frequent issues and figure out how to get your system balanced for a much smoother grow.
This part is all about becoming a plant detective. Instead of just treating the symptom, the wacky pH reading, we need to find the root cause. A balanced system is a happy system, and that’s exactly what your plants crave to thrive.
The Mystery of pH Drift
Have you ever set your hydroponic reservoir to a perfect 6.2, only to find it at 5.4 the next morning? That annoying drop is what we call pH drift, and it can drive you nuts. It’s especially common in hydro systems where there’s no soil to act as a buffer against changes.
Several things can cause this constant downward slide:
- Nutrient Formulas: Some nutrient lines, especially those heavy in ammonium nitrate, can naturally make the water more acidic as the plants feed.
- Root Respiration: It sounds weird, but your plants’ roots “breathe.” They release CO2 into the water, which forms carbonic acid and gradually lowers the pH. A big, healthy root mass will absolutely speed this process up.
- Microbial Activity: Beneficial microbes in your reservoir are great for your plants, but their life processes can also contribute to a slow and steady drop in pH.
If your pH is constantly on the move, don’t panic. It’s often just a sign that your plants are eating and growing happily. The key is to monitor it daily and make those small, gentle adjustments we talked about earlier to keep everything in that sweet spot.
Dealing with Low Buffering Capacity
Another major culprit behind unstable pH is the water you start with. If you’re using reverse osmosis (RO) or distilled water, you’re essentially starting with a blank slate. That sounds great in theory, but this pure water has almost zero buffering capacity, also known as alkalinity.
Think of buffering capacity as your water’s shock absorbers. Water without it is like a canoe in a storm; it gets tossed around by the smallest waves. A single drop of pH adjuster can send your reading swinging wildly from one end of the scale to the other.
The fix for this is actually pretty simple. You need to add a buffer back into your water before you add your nutrients. A quality calcium-magnesium (Cal-Mag) supplement is perfect for this. The minerals give the water some stability, making it much easier to dial in your pH without it bouncing all over the place.
When Your Soil Is the Problem
For those of us growing in soil, pH issues can sometimes be a bit more stubborn. If you’re constantly fighting low pH in your runoff water, your growing medium itself might be the problem. Some components, like peat moss, are naturally acidic and can pull your pH down over time.
This is where building a quality soil mix from the start pays huge dividends. Amending your soil with buffering agents like dolomite lime or crushed oyster shell provides a slow, steady release of alkalinity. This helps maintain a stable pH in the root zone for weeks or even months at a time. To get the full scoop on creating a solid foundation for your plants, check out our guide on cultivating the best soil for marijuana plants.
Ultimately, troubleshooting is about observation and patience. Pay close attention to how your system behaves, identify the underlying cause, and make a targeted fix. Once you nail down the source of your pH instability, your grows will become way more consistent and rewarding.
Answering Your Biggest pH Questions
Let’s tackle some of the most common questions that pop up when you’re dialing in your water. Whether this is your first grow or your fiftieth, these are the little details about raising water pH that can still trip up even seasoned growers. Think of this as a final gut check before you get to work.
Getting your water chemistry right is a constant learning process, but these answers should clear up any lingering confusion.
How Often Should I Be Checking My pH?
This is a big one, and the answer really depends on your growing medium. If you’re running a hydroponic or soilless setup like coco coir, you need to be checking your pH every single day. I’m serious. The pH in these systems can drift fast, and catching a problem early will save you a world of headaches down the road.
Now, if you’re growing in good old fashioned soil, you’ve got a bit more breathing room. Soil acts as a natural buffer, which helps keep the pH from swinging wildly. For soil grows, checking your water and runoff every other feeding is usually enough to stay on top of things. But if you see any weird leaf discoloration or signs of nutrient burn, checking your runoff pH should be your first move.
Can I Use Tap Water to Bodge My pH?
This is a tempting shortcut, but it depends entirely on your local water supply. Sure, some tap water is naturally alkaline and can nudge your pH up in a pinch. The problem? It often comes loaded with chlorine, chloramine, and a cocktail of other minerals (what we call “hardness”) that can throw your nutrient balance out of whack.
My take? Just don’t. Stick to a proper pH Up solution or one of the other methods we’ve already covered. Using tap water is unpredictable and introduces variables you don’t want to be dealing with, especially if you’re growing sensitive or finicky cultivars.
Keep it simple and use a product made for the job. Your plants will thank you for the consistency.
Does the Type of Pot Really Affect Soil pH?
Absolutely. The container you grow in can have a bigger impact on your soil’s chemistry than you might think. For instance, those classic unglazed terracotta pots are porous and can actually leach minerals into the soil over time, which might slowly raise the pH.
On the other hand, modern plastic or fabric pots are totally inert and won’t mess with your soil chemistry at all. This is one of the big reasons fabric pots have become so popular; they give you complete control over the root zone environment. It’s one less variable to worry about when you’re trying to nail that perfect balance.
Speaking of that perfect balance, here’s a quick cheat sheet for the ideal pH ranges. Keep this handy, as it’s the foundation of good nutrient management for your cannabis plants.
Ideal pH Ranges for Cannabis Growth
Here’s a quick look at the target pH levels for different growing mediums. Hitting these numbers is crucial for making sure your plants can actually absorb the nutrients you’re feeding them.
| Growing Medium | Optimal pH Range | Why It Matters |
|---|---|---|
| Soil | 6.0 – 7.0 | Soil provides a natural buffer, and this slightly acidic to neutral range allows for the uptake of a broad spectrum of nutrients. |
| Hydroponics | 5.5 – 6.5 | Soilless mediums require a more acidic environment for the direct and rapid nutrient absorption roots need to thrive. |
| Coco Coir | 5.5 – 6.5 | Coco acts more like a hydroponic medium than soil and needs a slightly acidic pH to prevent calcium and magnesium lockout. |
Nailing the right range for your medium is non negotiable if you want healthy, productive plants.
What’s the Worst That Can Happen If I Don’t Adjust My pH?
Ignoring your pH is probably the most common, and most damaging, mistake a new grower can make. If you don’t adjust it, you’re pretty much guaranteed to run into nutrient lockout. This is when your plants show signs of deficiencies, like yellowing leaves or brittle, purple stems, even though you’re feeding them a top shelf nutrient blend.
Put simply, they can’t eat the food you’re giving them. Over time, this leads to stunted growth, disappointing yields, and plants that are way more susceptible to pests and stress. Taking five minutes to test and adjust your water is one of the highest impact things you can do for your garden.
Ready to grow some incredible cultivars in a perfectly balanced environment? At Pacific Seed Bank, we’ve got hundreds of premium autoflower and feminized seeds waiting for you. Get your hands on top-tier genetics and start your next grow off right.


